

April 2008 Newsletter
President’s Message
Design Cues for Beginner and Novice Bonsai Enthusiasts
By Ken Fuentes
I was asked by a member of the club for any wisdom that would enable a beginner or novice to visualize the look of a finished bonsai tree when looking at pre-bonsai or raw stock material. He felt that he was not alone in the frustration he feels when pondering this process.
Since it is through experience in bonsai that the vision of how a bonsai tree will look when completed evolves, he was at a disadvantage. So I thought I would mention a few things that can lessen the pain, and with time will become a natural thought process. It is easy if you consider that what we are doing is creating an illusion of dimension. We are taking small trees and making them look like their full-grown counterparts in the wild. It is difficult to duplicate what is beautifully performed in nature, but it is possible to design a very believable representation.
I have found that a nicely designed tree is pleasing to the eye. It feels natural — not forced or manipulated. So for beginners the most prominent feature of any potential material must be pleasant to the eye. Most trees have a dominant feature that gives the tree its individual personality. This dominant feature will determine the style that you choose and will have to be incorporated in the design so there are some important things to consider.
Selecting a front with the best roots is the first and most important decision. Second, you will have to decide if this dominant feature is worthy of building a tree around, or is it a distraction? If it is a distraction and is permanent, can it be hidden or removed? If so, will you be able to find a front that will not be affected by this faulty feature?
Once a front has been determined, the flow of your eye should be smooth from the roots to the apex or top. The stability and strength of a tree begins at the base and the feel should become lighter as the line moves to the top. Very sharp bends in the trunk or branches that cross in front of the trunk from the front view are a distraction because it causes the natural flow of the eye to stop at that point.
Heavy branches near the apex defeat the illusion and will need to be removed and replaced with new growth that is kept in balance with its higher position in the tree. At this point, the tree will have offered its most logical end design, so your decision should become clearer. Add a few excellent growing seasons and a regimen of consistent wiring and pruning, and you are on your way.
Program Notes
Ted Matson Demonstrates the Fine Art of Raft-Style Bonsai
By David E. Whiteside
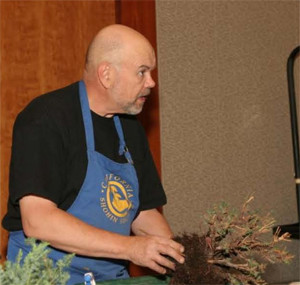
At the Conejo Valley Bonsai Society’s March meeting, popular Southern California bonsai teacher Ted Matson demonstrated raft-style bonsai with two pieces of material: a San Jose juniper (Juni-perus chinensis ‘San Jose’) from his personal collection and a young Prostrata juniper (Juniperus chinensis ‘Prostrata’) that he donated to the club.
Before working on the trees, Ted outlined some basic concepts for raft-style bonsai:
-

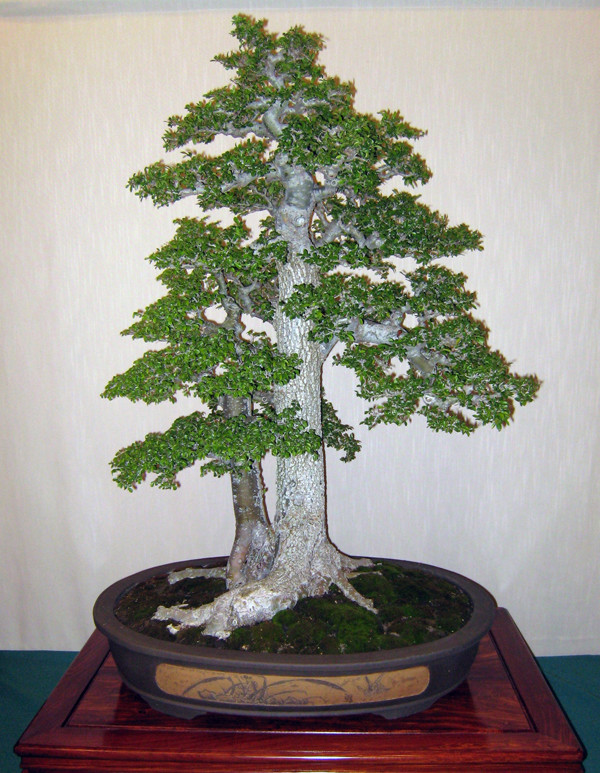
Photo 1: It has been about two years since this San Jose Juniper raft has been pruned. There are two basic categories of rafts: straight and sinuous. The straight raft features trunks in general alignment along the plane of the trunk and growing at different angles, while the sinuous style features trunks placed at different spacing away from the main line of the trunk to offer more depth. Sinuous can be done with an already bent tree or with straight material that is flexible enough to be bent.
- Rafts generally begin with normal, upright trees that are rooted at the base. Essentially, limbs along one side are re-moved; the bark on that side is peeled off to the heart wood so the cambium layer is exposed; rooting hormone is applied along the cut; and the tree is laid down on its side and the former trunk is covered with soil.
- If the tree is to be bent into the sinuous style, it has to be wired into the desired shape — but do the wiring after the bark has been pealed.
- After the initial potting, the first stage of raft development is to develop the new root system so the original root ball can be removed.
-
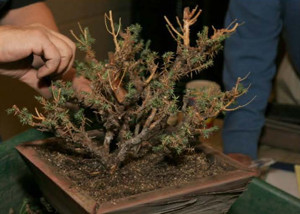
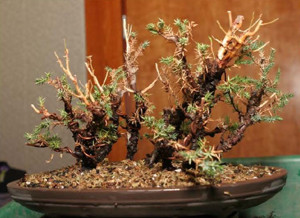
Photo 2: After pruning, Ted creates Jin. The next phase is to develop the original branches into the new trunks. As in group plantings, the tallest trunk should also be the thickest. Virtually any normal bonsai style can be used for the trunks, although formal upright would be very un-usual.
- As the trunks are established, their branches also must be developed to some extent via directional pruning because there often is little room to maneuver to wire the inner branches.
- While making a raft, the former trunk needs to be buried in soil. If the pot is too shallow, the new roots will be too close to the surface and they will dry out as fast as they form.
- When it is ready, the raft is repotted in a relatively long, narrow, shallow pot.
|
Turning to his demonstration materials, Ted explained that it had been about two years since the
last time he had done serious cleaning of his San Jose (see Photo 1), which has been under development as a raft for about 12 years.
During the first two years, he wired the branches that were be-coming trunks to enhance their placement. But the specimen has had no wire on it for 10 years. During that time, he did some directional pruning but most trimming was done to eliminate problems such as excess growth or developing knobs.
As a quick glance at Photo 4 shows, Ted pruned the San Jose severely and created plentiful jin, before re-moving it from the square wooden box it had been in from the be-ginning.
|
From this point on, Ted says he won’t let new growth go as much as it was at the beginning of this demonstration. He plans to do more pinching, develop foliage pads, and encourage new growth for a more balanced look. Eventually, when the new root system is adequately developed, the old trunk (now the horizontal base) will be exposed.
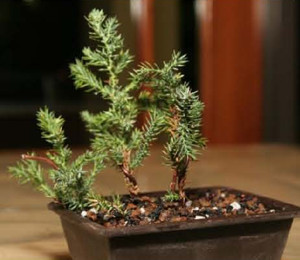
With the work on his San José juniper done, Ted turned to one of a half-dozen small Prostrata junipers he brought as a donation to the club. On this smaller material, he showed how to remove the unwanted side branches, peel the bark, and apply the initial wire.
In order to fit the Prostrata into a very small training pot, Ted used the main wire around the former trunk (becoming the new base) to bend the root ball so it is next to the trunk. He used lighter wire to put the former branches up into trunk positions.
|
For both of the rafts he worked on, Ted used an all-inorganic soil mix. To help the small raft retain moisture, he sprinkled mountain moss on the surface. By keeping more moisture at the top of the soil, the roots can grow close to the surface without drying out.
When moving a tree from an old mix into a new one, Ted says he uses fine particles to help the roots make the transition. The par-ticles in the new mix are irregular and have sharp edges, so they lock into place and each particle holds moisture, like a reservoir.
The Prostrata raft Ted created during the demonstration will be part of CVBS’s winter holiday raffle, but he also donated about a half-dozen other Prostratas just like the one he worked on. These will be available for sale at club meetings while the supply lasts.
Points To Remember
By Paul Centeno
|
Here are four things that I believe are important for bonsai enthusiasts to remember while practicing the art:
The Isosceles Triangle – What represents a well-balanced bonsai tree that shows symmetry, artistry, unity, and looks authentic to the eyes of the viewer? A bonsai tree represents the modified version of a natural tree that was carefully trained and styled by a bonsai artist. It shows the bonsai artist’s dedication and hard work in creating a beautifully designed tree based on the fundamental rules of bonsai design.
Bonsai masters will judge a tree, looking for the precise arrangement of the branches, cleanliness, and the overall appearance of the tree from the top of the apex to the length of the branches in the form of a triangle. Therefore, there are three fundamental points in every bonsai design: the apex, the midpoint, and the lowest point of foliage. These form an asymmetrical, or isosceles, triangle. In a well-developed tree, the highest point is the apex (signifying heaven); the midpoint is the foliage opposite the lowest branch (representing man); and the longest, lowest branch tip is the third angle (symbolizing the earth).
Pottery – There are many varieties of bonsai pots in the market nowadays and they come in a different shapes and colors. Some are glazed, some unglazed. Evergreen bonsai trees are more suited for unglazed brown containers, while glazed containers some in blue and light blue or green finish are commonly used on deciduous bonsai trees that bear fruit, flowers, or rich colored leaves like Trident Maple, Satsuki Azalea, Ginkgo Biloba, Liquidambar, and Crabapple. The finish of the container will complement the overall appearance of the bonsai tree. A glazed brown container can still be used if you desire.
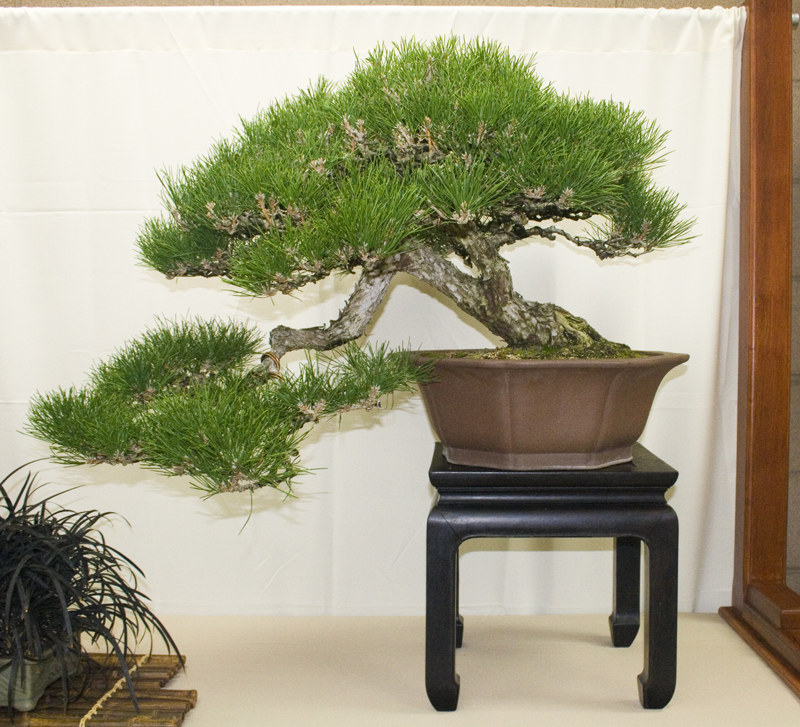
The shape of a pot is another important consideration in choosing a container. Some vary in depth. The length of the container should be 2/3 the height of the tree. If you use a much larger container, it will overwhelm the bonsai tree and it can be a distraction to the eyes of the viewers. Cascade, windswept, or literati style bonsai look good using round, hexagonal, or square containers. Rectangular and oval shape containers are good for formal upright and in-formal upright bonsai trees. A good example is the black pine: it will look good in a rectangular container.
When placing the tree on these containers (depending on the sizes of the branches), it should be slightly off center about 1/3 the distance from one end of the container when the branches are longer on one side than the other. When properly potted, the tree will harmonize the shape of the container.
Water – Rain water is best for watering bonsai trees. Try saving as much water during rainy season as you can. But unfortunately we use tap-water that contains chlorine and hard water and sometimes it affects some bonsai trees. The recommended solution: Fill up a large container with tap water, leave the top cover off, and let it stand for 24 hours before using. This will allow the chlorine to evaporate and you will have cleaner water for your bonsai trees.
Bonsai Specimen – It is a good idea to remember when buying a plant from a nursery, always get the name of the plant and the type specimen variety you have. It will save you a lot of time searching for the exact name of the plant you have.
Field Trip
Muranaka Bonsai Nursery Visit
By David E. Whiteside
|
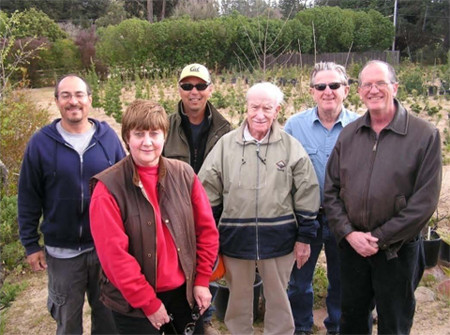
A half-dozen Conejo Valley Bonsai Society members carpooled from Westlake Village to Nipomo on Saturday, March 15. Despite forecasts of rain, the drive up U.S. 101 was clear and sunny.
Next month we will publish more photographs from this trip, plus pictures and information about some of the material your fellow members purchased on this outing. And stay tuned to our Web site (https://www.cvbs-bonsai.org/) for additional photos and details.
Meanwhile, for anyone interested in visiting this unique bonsai nursery, you will find Muranaka’s at 419 Pajaro Lane Nipomo, CA 93444. They’re open most days, but call ahead to be sure someone is available to help you: (805) 929-4818.
Expert Bonsai Tips
Those Demanding Deciduous Trees
By Jim Barrett
|

This time of year can be a very busy one for those of us with deciduous trees. De-ciduous trees need constant attention to keep upper growth in balance with the middle growth and the lower areas. Cut long shoots in the tops of maples, elms, and, especially, Zelkova, to one or two nodes or leaves. Rub off unwanted sprouts before they develop into shoots. Prune for shape and remove large leaves that block sunlight to the interior of the tree. From now on our task should be to encourage ramification, shape, and health.
Fertilize your trees with slow-acting fertilizers or time-release plant food. It’s better to feed a little fertilizer more often than a lot once in a while. Resist candle pruning your black pine bonsai until June or later. (Black pine in growing pots that need more development can be candle pruned in May). Repotting bonsai pot to bonsai pot can still be done safely, especially pomegranate, most Ficus, elms, wisteria, junipers, and azaleas. Olives can be potted, or if you wish, they can be worked on now.
Watch for powdery mildew on maples, quince, crabapples, and crapemyrtle. Watch for aphids and spider mites. They will be very active this year. If your trees are infested with black ants, chances are you have aphids or scale.
